Tuesday, September 20, 2011

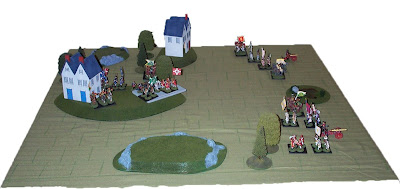
The Battle of Hugelstrasse

3 games in 3 weeks! Unheard of! I played a third game using Bob Cordery’s Portable Wargame rules. The scenario is number 50 from Grant’s Scenarios for Wargames, featuring an interesting collection of troops. One side is all cavalry and the other has very little cavalry.

The Batrachians, once again on the attack, with an all-cavalry force under the command of General Élan
The Cuirassiers Royale 1 and 2
The Wild Goose Chasseurs 1, 2, and 3
The Poupon Dragoons 1 and 2
The Chevaliers de Maurice (a unit of gentlemen volunteers who wear whatever suits them, no standard uniform - ok, I needed an 8th cavalry unit so I pulled some assorted extras)

The Soweiter forces, commanded by General von Blunder, marching down the road from northeast to west in this order:
The Ballyfoole Hussars
The Muttonshire Musketeers
The Woostershire Muskets
The Soforth Highlanders
The Mayeux Musketeers
The Glossopshire Croats
The Jaegers zu Pfeffernusse
2 cannons of the Ballyfoole Artillery
The Pfennig-Pfarthing Pfreikorps

A cloud of dust is spotted to the northwest. It’s Batrachian cavalry! Hordes of them! The only chance for the Soweiter forces is to head for the hills to the south of the road.


Turn 1, The race is on

Turn 2 The Batrachians gain the initiative and begin to catch up with some of the rearmost Soweiter forces. The Wild Goose Chasseurs 2 charge the Malarkey Musketeers and destroy them. The Wild Goose Chasseurs 3 charge the Ballyfoole Artillery 1 and both units are destroyed! The Wild Goose Chasseurs 1 charge the Glossopshire Croats and destroy them. The Poupon Dragoons 1 charge the Mayeux Musketeers and both units are destroyed. The Poupon Dragoons 2 charge the Nuttonshire Musketeers and both units are destroyed. Most of the remaining Soweiter forces reach the hills, except for the Jaegers zu Pfeffernusse, who have taken cover in a small woods near the road. The Jaegers fire out of the woods and destroy the Wild Goose Chasseurs 1. A rather “bloody” affair for all.


Turn 3 The Soweiter forces gain the initiative. The second Ballyfoole Artillery unit moves further along the hill. The Jaegers fire at the Cuirassiers Royale 2 and destroy them. And the rest of the Soweiter forces position themselves on the hills and prepare for the onslaught. The Batrachian Cavalry closes in.


Turn 4 The Soweiter forces still have the initiative and take the opportunity to fire, but to little effect this time.
The Wild Goose Chasseurs 2 charge and destroy the Ballyfoole Artillery. The Chevaliers de Maurice charge the Woostershire Muskets, but it’s an uphill battle and the Chevaliers are destroyed. The Cuirassiers Royale 1 charge the Soforth Highlanders and fight to a standstill.


Turn 5 The Batrachians gain the upper hand again. The Wild Goose Chasseurs 2 swing back west down the hill and charge the Jaegers zu Pfeffernusse, who had left the protection of the woods. But the Jaegers fight back gamely and it’s the Wild Goose Chasseurs whose goose is cooked. The Cuirassiers Royale 1 continue their melee with the Soforth Highlanders and destroy the doughty Highlanders. The Cuirassiers are then subjected to a hail of gunfire from the Jaegers, to little effect, and then the Woosetershire Muskets, who finally destroy the Cuirassiers.


At that the Batrachian forces are wiped out, but since they managed to destroy well over half of the Soweiter forces the Batrachians win the day. A Pyrhhic victory?

Another fast and furious Portable Wargame battle. With 3 battles under my belt I was thinking of trying some modifications next, but I see Bob has posted a new version of the rules so I‘ll likely give those a go. In recent comments here Ross Mac mentioned using straight line measurements in place of the grid. I may try that. Grids have the advantage that no measuring is required, and also make it clearer who is facing who, with no fiddling about overlaps and such. On the other hand I do like a clean battlefield without lines or marks to designate spaces so I may just give it a go to see how I like using the rules gridless.

Saturday, September 10, 2011

The Battle of Bruckwasser

note: the previous game I reported on where I used Bob Cordery's Portable Wargame 2 rules, the battle of Zweipfennig took 5 turns to play. The battle of Bruckwasser took 9 turns, still quick.


Scenario #6, Crossing Point, from Grant’s Programmed Wargames Scenarios

Batrachian forces, under General Soleau:
The Cuirassiers Royale
The Poupon Dragoons
The Wild Goose Chasseurs
The Garde n’est Pas
The King’s Musketeers
The Queen’s Musketeers
The Pandours du Pinque
The Pandours San Serif
The Musketeers L’Ouef
2 cannons

Soweiter forces, under General Cummerbund:
The Jingleheimer-Schwartz Cavalry
The Ballyfoole Dragoons
The Ballyfoole Hussars
The Muttonshire Musketeers
The Woostershire Muskets
The Soforth Highlanders
The Pfennig-Pfarthing Pfreikorps
1 cannon


The Bruckwasser River runs east to west. Two stone bridges cross the river and the village of Bruckwasser lies on the south bank of the river between the 2 bridges. The Batrachian forces are looking to capture the bridges so they can strike deeper into Soweiter territory. The Soweiter League has a couple of units, the Malarkey Musketeers and the Soforth Highlanders, stationed in the town to guard the bridges. Other forces are stationed in nearby villages and other posts.

General Soleau, commanding the Batrachian forces, hopes to capture the bridges before the Soweiter reinforcements can shore up their defense. The battle starts out with the Batrachian forces coming from the west along a road that roughly follows the north bank of the river. The column is led by the Poupon Dragoons, followed by the Wild Goose Chasseurs, The Garde N’est Pas, the King’s Musketeers, and so on.


Riding quickly the Poupon Dragoons reach the west bridge, but are destroyed by a hail of fire from the Malarkey Musketeers in the western part of the village.

The Wild Goose Chasseurs swing around to the east bridge and are met by volleys from the Soforth Highlanders in the east part of the village, but little damage is sustained. The Garde N’est Pas reach the west bridge and also survive the volleys from the Malarkey Musketeers.


The Wild Goose Chasseurs gallop over the bridge to meet any potential Soweiter reinforcements that may arrive along the southeast road. The Garde N’est Pas cross over the bridge and fire at the Malarkey Musketeers in the village to little effect. 

(Camera batteries ran down so I didn't get photos for the middle of the battle)

The Malarkey Musketeers return fire and destroy the Garde N’est Pas. The Jingleheimer-Schwartz Cavalry arrive on the southeast road and the Pfennig-Pfarthing Pfreikorps arrive on the west road, south of the river.

The Jingleheimer-Schwartz Cavalry charge the Wild Goose Chasseurs and destroy them. The Malarkey Musketeers fire at the King’s Musketeers on the bridge to little effect. The Pfennig-Pfarthing Pfreikorps advance towards the west bridge. The Ballyfoole Hussars arrive on the west road, the Muttonshire Musketeers on the south road and the Ballyfoole Dragoons on the southeast road. The King’s Musketeers fire at the Malarkey Musketeers but cause few casualties if any.

The Pfennig-Pfarthing Pfreikorps fire at the King’s Musketeers on the west bridge and cause little damage. The Malarkey Musketeers also fire at the King’s Musketeers and destroy them. The Soforth Highlanders fire at the Queen’s Musketeers who have moved on to the east bridge. The withering fire destroys the Queen’s Musketeers. The Batrachian artillery having taken up position on the north bank of the river opposite the village open fire on the troops in the village. The Highlanders survive, but the Malarkey Musketeers finally succumb to the onslaught.

The Batrachian artillery fires again at the Highlanders, this time destroying them. The Pandours San Serif and the Musketeers L’Ouef reach the west bridge and start crossing over. The Pandours du Pinque reach the east bridge, with the Cuirassiers Royale close behind. The Pfennig-Pfarthing Pfreikorps fire at the Pandours San Serif and destroy them. The Malarkey Dragoons charge the Pandours du Pinque on the east bridge, but the tables are turned and it’s the Dragoons who succumb. The Muttonshire Musketeers occupy the village.


The Muttonshire Musketeers fire at the Musketeers L’Ouef, as do the Pfennig-Pfarthing Pfreikorps, but neither achieves much success. The Jingleheimer-Schwartz Cavalry charge the Pandours du Pinque and destroy them. The Batrachian cannons fire at the Muttonshire Musketeers to little effect. The Musketeers L’Ouef charge the Pfennig-Pfarthing Pfreikorps and are destroyed. The Cuirassiers Royale charge the Jingleheimer-Schwartz Cavalry and destroy them.


The Muttonshire Musketeers fire at the Cuirassiers Royale and destroy them.

At this point the only units left to the Batrachians are the cannons north of the river. So with no hope fo capturing and holding the bridges they beat a hasty retreat.

The Woostershire Muskets and the Soweiter cannon arrive, on the west road and southeast road respectively, but by this time the battle is over.


As before these rules played very quickly. Firing and combat are "bloody", in the sense that units can get destroyed quickly. That's not all bad and in fact is one of the reasons the games are quick. Not having to fiddle around with movement or search through pages of rules or follow complicated turn sequences help, too.
There were times where a combat could have gone either way or even where the odds favored one side, but I seemed to roll ones at just the wrong times for some of the cavalry. Positioning the Batrachian cannon on the north side of the river to fire across at the village worked well, even though according to the orders I rolled for the scenario maybe they should've headed for the bridges like the rest of the units. The Programmed Scenarios offer programmed options for both sides, as well as allow the player to play one or both sides. Often there are restrictions, special circumstances, etc, that will limit what you can do. There are also various things you roll for, from the maps to set up options to orders to reactions in some cases. This means each time you play a scenario it can vary quite a bit.

Sunday, September 4, 2011

The Battle of Zweipfennig


I used Bob Cordery's Portable Wargame 2 rules for this game. That's the version that fits on a single sheet of paper. I don't know if I did things right, but it seemed like the defenders had a decided advantage. It took about an hour to set up and play this, leisurely, taking notes and pictures (although I forgot to take pictures a few times because it moved so quickly), consulting the scenario book and rules sheet, etc.

The scenario is # 37, Night Attack 2 from Scenarios For All Ages by Grant and Asquith.

A force comprised of units from the Soweiter League had occupied two villages and the ridge connecting the two, expecting to meet an attack by a more sizable Batrachian force in the area.

Soweiter League force:
General Jacques Pfennig-Pfarthing
cavalry:
The Ballyfoole Dragoons
The Ballyfoole Hussars
line infantry:
The Muttonshire Musketeers
The Woostershire Muskets
The Soforth Highlanders
The Pfennig-Pfarthing Pfreikorps
1 cannon

Unbeknownst to the Soweiter forces the Batrachians had moved up in the night to attack the Soweiter force in the left flank. The Batrachians had divided into two forces to accomplish this.
The first force under the command of General Finn de Siecle came from the more southerly direction. The other force, under the command of General Soleau, came from a more northerly direction.

The southern Batrachian force:
General Finn de Siècle
cavalry:
The Wild Goose Chasseurs
Infantry:
The Garde N'est Pas
The Musketeers L'Ouef
The Pandours du Pinque
The Pandours San Serif
1 cannon

The northern Batrachian force:
General Napoleon Soleau
cavalry:
The Cuirassiers Royale
The Poupon Dragoons
infantry:
The King's Musketeers
The Queen's Musketeers
The Musketeers de Limbourg
1 cannon

The situation at dawn:

As dawn broke and the Batrachians were able to see the Soweiter forces arrayed in and between the two villages they realized they had not arrived exactly as planned. The force under General de Siècle was heading in the right direction, but farther back than expected. Meanwhile, the force under General Soleau had mistaken another group of buildings to the northeast of the Soweiter line as one of the two villages. As the Batrachians moved forward the Soweiter forces realized the danger and General Pflugnickel re-ordered his line, sending some of the troops towards the northeast buildings and repositioning some of the troops that remained on the hill and in the east village.


The Batrachians retained the imitative and proceeded to advance on the Soweiter position. As the southern force under General de Siècle neared the east village the Woostershire Muskets stationed there opened fire. In the ensuing hail of musket fire the Musketeers L'Ouef were knocked out of the fight (result = destroyed).


As the Batrachians advanced further towards the east village the Soweiter artillery rang out and put paid to the Pandours San Serif (result = destroyed). The Woostershire Muskets fired at the Wild Goose Chasseurs to little effect (result = no effect). As events developed it was a toss up as to which side would reach the northeast buildings first. The Soweiter League won the toss and the Muttonshire Musketeers managed to get there first. By this time the Soweiter forces were mostly in position and firing broke out all along the line. The Soforth Highlanders devastated the  Poupon Dragoons (result = destroyed), but the Pfennig-Pfarthing Pfreikorps, the Queen's Musketeers and the King's Musketeers failed to inflict any significant losses on their opponents (results = no effect).

The initiative seemed to be firmly in the Soweiter force's favor now. More cannon fire and musket fire rolled up and down the line. The cannon fire had little effect, but the Muttonshire Musketeers, the Soforth Highlanders, The Pfennig-Pfarthing Pfreikorps, and the Woostershire Muskets caused widespread destruction and disruption (results = destroyed). This put the Pandours du Pinque, the Cuirassiers Royale, the Queen's Musketeers and the King's Musketeers out of the fight.

At this point, with only his artillery left, General Soleau quit the field. He was followed shortly by General de Siècle, having only the Wild Goose Chasseurs, the Garde N'est Pas and the straggling artillery, so to carry on the attack seemed futile at this point.

Having beaten off this flank attack the Soweiter forces retired back to the villages to rest and recuperate.

Maybe I should've moved the Batrachians slower to give them time to bring their artillery to bear and to inflict some small arms losses on their enemies. As it turned out moving in quickly didn't seem to favor the attackers.