Friday, December 30, 2011

Song of Lace and Tricornes

Actually, Songs of Drums and Shakos. I used those rules from Ganesha Games for a quick little raid (quicker than I expected!). The rules are designed for Napoleonic skirmishes, but I figured at the skirmish level there wouldn't be enough difference between the earlier tricorne era and the Napoleonic era to worry about.

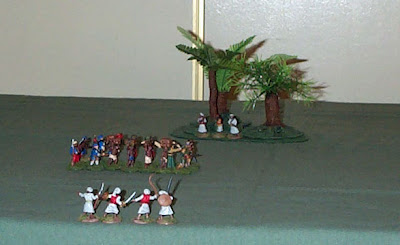
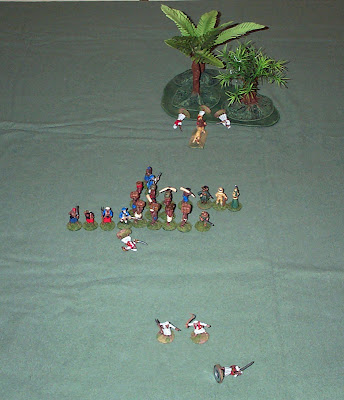
The situation was a corral of cattle being guarded by the Batrachians (using French stats of course), with the Soweiter forces on a foraging mission/raid. This takes place at dusk so visibility is limited. The scenario is taken from the rules. Here is the initial setup:
The Batrachian forces include Captain le Blanc, Sergeant Gaston and 6 line infantrymen inside the tent, 3 more infantry patrolling just inside the hedge (fence) around the tent, another pacing back and forth at the gate to that area, and 2 more standing at the gate to the stonewalled corral.

The Soweiter forces include Captain MacDonall of the Gunderland Highlanders and 6 Highlander infantry (using the Highlander stats, imagine that), and 1 light infantryman from Ballyfoole. Captain MacDonall sent the light infantryman to the south of the road to infiltrate through the woods and try to take out or at least distract the 2 sentries at the corral. Meanwhile the Captain and his squad of Highlanders approached through the woods north of the road to attack the main camp of Batrachians.

In these rules you roll dice to activate figures, leaders like the Captains, can order a group if the leader makes his activation roll. You can choose to roll 1, 2, or 3 dice and 2 failures on a roll of the dice means the action switches over to the other side. This scenario had some special rules that certainly affected the final outcome of this game.

As it turned out the Batrachians moved first, but under the scenario rules that only meant the sentries moving, circling the tent or pacing in front of the gate. Next, Captain MacDonall ordered the Highlanders to move up to the edge of the woods, and the light infantryman also moved through the woods to the south and up to the lone tree. About as close as he could get to the sentries by the corral without being seen.
The sentries continue pacing back and forth and around. Suddenly shots ring out all around! The Highlanders kill one of the 2 sentries closest to them, while the other sentry falls to the ground (diving for cover no doubt).

The light infantryman is still getting set up (failed his activation roll so play passes to the Batrachians).
The Batrachian officer, Captain le Blanc, reacts to the gunfire and tries to rouse his men, but they are slow to act (they failed their activation roll).
The Highlanders reload their muskets. Meanwhile, the light infantryman takes an aimed shot at the closer of the 2 sentries at the corral gate. The sentry dives for cover.
Captain le Blanc and Sergeant Gaston come out of the tent, but the rest of the men fail to followup (failed roll).
Captain MacDonall orders his men to fire a volley at the Batrachian officers, killing Captain le Blanc. Sergeant Gaston's nerves fail him (fails his morale throw) and the Batrachians surrender. The Soweiter forces will have some beef to drive back to their unit tonight.


Like I said, this game played very quickly, due to the scenario rules that specified if the defender's leader was killed and the NCO failed his morale roll it was all over. The other possibility would have been the NCO passed his morale roll, at which point he would be considered the leader with attendant abilities and bonuses to the troops. Then each of the defenders would have to roll for morale. The NCO could've then called on any of the infantry who passed their morale, and would have stood a decent chance against the Highlanders, I think. Sometimes things just go well for one side or badly for the other.
In spite of that, the Song of ... seem like a good fun set of rules for small skirmish and man to man (or other creatures) actions. I bought the "bundle" quite a while ago, including mostly the fantasy stuff, but this was the first time I got around to trying any of them. I think they will be good for "quickies", especially if I play enough to get the rules "down".

Sunday, December 25, 2011

The Battle of Hill Valley (or, a Pithy Tale)

As I mentioned in my previous post this is a battle on the North-by-Northwest Frontier I played out with the Pith Helmet rules. One interesting thing about these rules, especially for a solo player, is the reaction system where units react to being fired on, having enemy units approach within a certain distance, or upon being charged. Sometimes these reactions can work to your favor, Other times they can get in the way of your plans. Also, casualties are not necessarily gone. I highly recommend reading the reports on the Kelroy Was Here blog and also downloading the rules and the accompanying files which include a battle report by the rules author.

The situation I laid out was a patrol comprised of the Grand Thidwick 1st and 2nd regiments, a unit of Gunderland Highlanders, all with 6 figures including 1 leader and 1 NCO, and using the British stats in the rules. Along with them were a unit of Djahli natives, 'the Mongoose regiment", using the Punjabi stats. They were up against a number of hill tribesmen using the Pathan stats.

I set up some terrain on my table (40 inches square), and placed a die at each terrain element to represent potential forces. When the force was encountered by the patrol, which I decided would mean getting within the range that would cause a reaction test, or If it looked like it was a good time to activate any unit, I would roll 1d6 and place one of the units (randomly determined from several possible units I had set aside) on the table. In the meantime they would still get Action Points as described in the rules and could act if need be.

Here is the valley as the first two units of the patrol, Grand Thidwick 1 and the Mongooses approach along a dirt road.

Turn 1.
As they approach both the patrol and the Pathans react hastily to events (1 unit on each side can use 1 action point - the die next to each unit shows the number of action points they have. I turned the die to 6 when the unit was out of action points - in future games I might try some other sort of markers that don't look so out of place). Luckily for the patrol there were no tribesmen in the first set of hills to their right, but there was a group in the woods and rocks to the left. 6 figures, half with rifles and half with swords and shields. These came charging out towards the column.
The charging tribesmen move in closer and fire at the Grand Thidwick unit, but no one is hit. The Grand Thidwick unit reacts by changing formation into line to face the tribesmen. They then fire off a volley at the tribesmen, inflicting no casualties but still cause them to become shaken. Meanwhile the Mongooses move up and I bring on Grand Thidwick 2.
At this point I decided to bring out all of the native units as that would allow many of them to start participating in the battle. So a unit of 6 rifles and 2 sword and shields armed tribesmen run down off the little outcropping with a lone pine tree and head towards the column. 4 cavalry, half with rifles and half with sword and shield, emerge from the rocks and trees just past the little outcropping. They ride fast towards the column (I moved them 2 moves). On the far hills on the upper left 6 natives with rifles, 1 with a pistol, and 2 with sword and shield pop up, but hold their position for now. And yet another group, with 5 rifles and 1 spear appear in the woods to the upper right. These also hold their position. That's the lot.The Mongooses and Grand Thidwick 2 fire at the first group of natives, inflicting 3 casualties, including the "NCO". The natives' reaction is to hold their ground.

Next, Grand Thidwick 1 also fires at the first group of natives, inflicting 2 more casualties. The Highlanders are brought on board.
2 of the natives are dead, 3 more return to the unit.


Turn 2.
The native cavalry fire at Grand Thidwick1, scoring 1 hit. Grand Thidwick 1 reacts by changing formation to face the cavalry. The native cavalry fire again, scoring 2 hits including the NCO. Grand Thidwick reacts by firing back but score no hits. The Mongooses fire at the second native infantry group as it approaches and score a hit. The natives retreat 6 inches and are shaken. The Mongooses then move up to support Grand Thidwick 1 and fire at the native cavalry, scoring no hits. The cavalry fire back, also missing.

The Highlanders move up, change into line formation and fire at the first group of natives, scoring 1 hit. The natives hold.
Grand Thidwick 2 fire at the first group of natives, scoring 2 hits including the "NCO". The natives fall back 4 inches. Grand Thidwick 2 move forward and fire at the natives again, scoring 1 more hit. All of the natives from this first group are now out of commission (in the "Rally Zone").
The Mongooses fire at the native cavalry again, scoring another hit, this time on the unit's "NCO". The cavalry retreat 4.5 inches and are shaken.
The native group in the far hill, seeing many of their brethren in trouble, decide to move down off the hill and run towards the fighting (4 moves, bringing them close to the fighting very quickly). The Highlanders and Mongooses move up in line to support Grand Thidwick 1.

Now we see what happens to the various casualties. The leader and "NCO" from the first group of natives die and the 2 remaining troops rout. The one casualty from the second group of natives dies. The casualty from the native cavalry returns to his unit. All of the casualties from Grand Thidwick 1 return. The few remaining figures in the first group of natives rally. The second group of natives and the native cavalry also rally.

Turn 3.
The native cavalry move farther down the road and the second group of natives also move in closer. The Mongooses fire at the cavalry, scoring 2 hits, but this only seems to infuriate the cavalry who react by advancing towards the Mongooses. Grand Thidwick 1 also fires at the cavalry, scoring another hit, but the cavalry hold. Grand Thidwick 1 then fires at the second group of natives, scoring 2 hits. The natives hold. The Highlanders fire at the second group of natives also and score another hit. The natives still hold. Then Grand Thidwick 1 fires at the natives yet again, scoring one more hit. The second group of natives moves forward and fires at Grand Thidwick 1, but they seem to be a bit rattled and score no hits. Grand Thidwick hold. The third group of natives, from the hills, quickly move in and fire at Grand Thidwick 1, but also score no hits. Grand Thidwick 1 fires at the third group of natives and scores 1 hit.
The Mongooses fire at the cavalry, scoring 1 hit, which puts them all out of commission (in the "Rally Zone). Then a couple of rounds of firing by the Highlanders and the third group of natives has no effect.
Grand Thidwick 2 fires at the second group of natives, scoring 1 hit, and the natives are now shaken.
At this point all of the native units had used up their Action Points, but the Soweiter forces had points left to use, so I just let them act. This involved a flurry of volleys all along the line, resulting in casualties in all of the remaining native units and all of them becoming shaken (except for the 1 unit still in the woods farther up the road)
Settling up the score, sees the casualties in the first group of natives recover, 4 dead in the second group and 2 returns, 1 dead in the third group, 1 cavalry captured and 1 joining in with the third group of natives and 2 more routing up the valley.


Turn 4.
The Mongooses fire at the third group of natives, scoring 1 hit. The natives become shaken and run away. The second group of natives decide to head the the rocky area below the far hills. Meanwhile the natives in the woods decide to join the fighting, so they move down the road, firing twice at the Mongooses, but scoring no hits and the Mongooses hold their ground. Then the Mongooses return fire at these natives, scoring 2 hits. Grand Thidwick also fire at the same group of natives, scoring 2 more hits. The natives return fire, scoring 1 hit on Grand Thidwick 1.

At this point I decided to "call the game". The natives are pretty chewed up, while the Soweiter forces are doing quite well. It doesn't seem likely that the natives can prevail.

This was a fun game, although I may have to give the natives more forces next time! As it happens the recovery phase seems to favor more non-native forces returning to battle, so the natives tend to get whittled down. Or maybe the Colonial forces got lucky this time. Over all, with note-taking and picture-taking (which I forgot to do at points in the "heat of the action"), I played this out over the course of 3.5 to 4 hours in 2 evenings. I confess the format of the rules was a bit off-putting for me, so I reformatted them to better fit my taste (and my eyes, which means a larger font size!), which resulted in 6 pages including the various tables. Still, it's a very concise set of rules, with some interesting mechanisms that make for a somewhat unpredictable game, especially the reactions to events and the casualty recovery and the Action Points and activation systems, great for solo play. And it seemed to work well on my small table and few figures with only minimal adjustments (really all I did was halve all distances, but not casualties or anything else).

Reports Coming in from the North-by-Northwest Frontier

I'm playing a little battle between Soweiter League forces (or the Anglophone portion thereof) and some wild hill tribes of Ollistan. I'm using the Pith Helmet rules as described and reported by Kelroy Was Here . Look for his posts with the "Pith Helmet II" tag. The rest of his posts are worth perusing as well. The rules are also available for free download as Kelroy notes (read his posts to find the link). The downloads include a report of a game played by the rules author. These reports are very helpful in understanding the rules.
I'll post report(s) and pics when I finish the battle. Because I have few figures and a smaller table I am playing with a couple of modifications, well, one really. I'm only using around 6-8 figures per unit (6 for the European side and 4 (cavalry) or 6-8 (infantry) for the natives.) The only rules mod I'm making is to halve all distances. I've played 2 turns so far. Each turn can have multiple phases until units use up their Action Points or decide to pass, so a lot more has happened so far than "2 turns" might make it seem. It's also been a lot of fun. I could see using these rules more (and probably adding some of the author's additions and maybe one or two of my own. I was thinking, for example, that you could leave the jokers in the card deck used for various things in the game and if you draw a joker have some random event happen.). It's possible (probable?) I have made mistakes in the way I am playing, but it still seems to work and as a solo player my opponent/gaming partner has no objections.
(one example of a possible error on my part - if a unit has the action points and the card draw allows it I have moved or fired more than once at a time. So far it hasn't seemed unbalanced.)

Happy Holidays to all! May you have time for toys and hobbies during the holidays and throughout the coming year!

Friday, December 16, 2011

The Return of the Ballyfoole Expedition

The Illustrated Ballyfoole Gazette
"Where we never let the facts get in the way of a good story"
Second Expedition Explores the Interior of Afrodesia

Yet again those intrepid Ballyfoole Explorers set off into the wilds of Afrodesia. Lead, as always, by Captain Flynn, with O'Ryan the hunter and Maggie O'Hara, and joined by their new scout, McGonigle, who replaces McGillicuddy who perished during the last exploration. The balance of the expedition included two soldiers of the Gunderland Highlanders, four loyal askaris and 12 bearers. Their starting point this time is an area of savanna they explored during previous outings.

Day 1 they head off into the savanna. Except for some ancient ruins where they find loads of loot the area is deserted. (since they are just starting out they have no empty bearers, so I'm not sure if the others can carry the loot or if it has to be left where it is)

Day 2 they march farther into the savanna. During the march a rockslide nearly takes out one of the askaris, but quick action saves him. Still no natives are encountered

Day 3 they continue to march into the savanna and discover a new plant species - a large poisonous yellow savanna rose. They also encounter some natives. The expedition gives the natives some trade goods. The natives are friendly.

Day 4 they march eastward into more savanna, where they encounter a survivor from some lost expedition. Just a lone empty bearer. (this was an even I added to the mix; rolled on the same chart used to find who succumbs to events to find out who it was the expedition found. This individual will only stay with the expedition until they return home. So, even if it turned out to be an explorer he would not stay with the expedition for future journeys.) No natives encountered.

Day 5 they march south into more savanna and discover another new plant species - a large poisonous herb (maybe hyenasbane?). They come across a river and meet up with some natives. After offering them some trade goods the natives appear friendly and the expedition buys a couple of days worth of food with some of their remaining money.

Day 6 they march east, losing sight of the river. Later 2 of the bearers succumb to bad water, 1 trade bearer and 1 food bearer. They encounter more friendly natives and buy 2 loads of trade goods from them.

Day 7 They march south into more savanna, but suddenly they are ambushed by natives. 3 natives with rifles fire from a stand of trees on one side, while 4 more natives armed with swords and other hand weapons charge from the other side, but no casualties are inflicted. 
The expedition returns fire, killing 1 rifle armed native and 1 native armed with a hand weapon. All of this commotion stirs up a lion who springs forth and attacks a bearer, but the bearer fights back.

The natives fire again and miss again, the natives armed with hand weapons charge hit, but cause no hits, and the lion continues to struggle with the feisty bearer.
The expedition fires at the rifle armed natives, killing both of them. While one of the Highlanders dispatches one of the hand weapon natives. The struggle between the lion and the bearer is still inconclusive.
At this point the remaining natives flee (and, as that ends the encounter, I also figured the lion gave up on the bearer, maybe to chase after one of the fleeing natives.)

Day 8 they start to march, but the day proves to be filled with oppressive heat. So they decide to recuperate from yesterday's ambush and try to relax in what shade they can find.

Day 9 lost

Day 10 they march on and into desert; sometime during the day the last man in the expedition, an askari, disappears. Later they encounter some natives, the expedition give them some trade goods, and the natives are friendly.

Day 11 they continue to march through the desert and discover a lake. No natives are encountered.

Day 12 the march back to their starting point.

Another successful bit of exploration, if fairly uneventful this time, helped by bringing along trade goods to pacify and placate the natives they encountered. It just goes to show that although, in Afrodesia (or Jimland), anything can happen, sometimes it doesn't.

This was the second game I played in honor of Solo Wargaming Day back on 11/11/11.