Showing posts with label photo. Show all posts

Sunday, July 28, 2013

Rock/s and Roll

I created some more rock piles/rocky/rough ground (rocks made from cellu-clay), stands of vegetation that can stand in for elephant grass (long grass-like plastic aquarium plants), and based some old conifers to add to my old tree stands. All bases were cut from mdf board.

The vehicle is a steam tank I made from a plastic Mott's applesauce container (molded to look like half a barrel), some mdf board and pine wood, a dowel, a wooden peg from the craft store (for the smokestack), a button, some gears, a washer, and a plastic stick from some old toy (for the gun barrel). Here are some closer shots with a 28mm Foundry figure for size comparison.
The top and bottom are not glued together, but have a dowel and hole so the top can be rotated.

As far as gaming goes, I've mostly been playing boardgames and card games this summer, games such as Wrath of Ashardalon and the Lord of the Rings card game, as they can be played solo as and when time and energy allow.

Saturday, September 10, 2011

The Battle of Bruckwasser

note: the previous game I reported on where I used Bob Cordery's Portable Wargame 2 rules, the battle of Zweipfennig took 5 turns to play. The battle of Bruckwasser took 9 turns, still quick.


Scenario #6, Crossing Point, from Grant’s Programmed Wargames Scenarios

Batrachian forces, under General Soleau:
The Cuirassiers Royale
The Poupon Dragoons
The Wild Goose Chasseurs
The Garde n’est Pas
The King’s Musketeers
The Queen’s Musketeers
The Pandours du Pinque
The Pandours San Serif
The Musketeers L’Ouef
2 cannons

Soweiter forces, under General Cummerbund:
The Jingleheimer-Schwartz Cavalry
The Ballyfoole Dragoons
The Ballyfoole Hussars
The Muttonshire Musketeers
The Woostershire Muskets
The Soforth Highlanders
The Pfennig-Pfarthing Pfreikorps
1 cannon


The Bruckwasser River runs east to west. Two stone bridges cross the river and the village of Bruckwasser lies on the south bank of the river between the 2 bridges. The Batrachian forces are looking to capture the bridges so they can strike deeper into Soweiter territory. The Soweiter League has a couple of units, the Malarkey Musketeers and the Soforth Highlanders, stationed in the town to guard the bridges. Other forces are stationed in nearby villages and other posts.

General Soleau, commanding the Batrachian forces, hopes to capture the bridges before the Soweiter reinforcements can shore up their defense. The battle starts out with the Batrachian forces coming from the west along a road that roughly follows the north bank of the river. The column is led by the Poupon Dragoons, followed by the Wild Goose Chasseurs, The Garde N’est Pas, the King’s Musketeers, and so on.


Riding quickly the Poupon Dragoons reach the west bridge, but are destroyed by a hail of fire from the Malarkey Musketeers in the western part of the village.

The Wild Goose Chasseurs swing around to the east bridge and are met by volleys from the Soforth Highlanders in the east part of the village, but little damage is sustained. The Garde N’est Pas reach the west bridge and also survive the volleys from the Malarkey Musketeers.


The Wild Goose Chasseurs gallop over the bridge to meet any potential Soweiter reinforcements that may arrive along the southeast road. The Garde N’est Pas cross over the bridge and fire at the Malarkey Musketeers in the village to little effect. 

(Camera batteries ran down so I didn't get photos for the middle of the battle)

The Malarkey Musketeers return fire and destroy the Garde N’est Pas. The Jingleheimer-Schwartz Cavalry arrive on the southeast road and the Pfennig-Pfarthing Pfreikorps arrive on the west road, south of the river.

The Jingleheimer-Schwartz Cavalry charge the Wild Goose Chasseurs and destroy them. The Malarkey Musketeers fire at the King’s Musketeers on the bridge to little effect. The Pfennig-Pfarthing Pfreikorps advance towards the west bridge. The Ballyfoole Hussars arrive on the west road, the Muttonshire Musketeers on the south road and the Ballyfoole Dragoons on the southeast road. The King’s Musketeers fire at the Malarkey Musketeers but cause few casualties if any.

The Pfennig-Pfarthing Pfreikorps fire at the King’s Musketeers on the west bridge and cause little damage. The Malarkey Musketeers also fire at the King’s Musketeers and destroy them. The Soforth Highlanders fire at the Queen’s Musketeers who have moved on to the east bridge. The withering fire destroys the Queen’s Musketeers. The Batrachian artillery having taken up position on the north bank of the river opposite the village open fire on the troops in the village. The Highlanders survive, but the Malarkey Musketeers finally succumb to the onslaught.

The Batrachian artillery fires again at the Highlanders, this time destroying them. The Pandours San Serif and the Musketeers L’Ouef reach the west bridge and start crossing over. The Pandours du Pinque reach the east bridge, with the Cuirassiers Royale close behind. The Pfennig-Pfarthing Pfreikorps fire at the Pandours San Serif and destroy them. The Malarkey Dragoons charge the Pandours du Pinque on the east bridge, but the tables are turned and it’s the Dragoons who succumb. The Muttonshire Musketeers occupy the village.


The Muttonshire Musketeers fire at the Musketeers L’Ouef, as do the Pfennig-Pfarthing Pfreikorps, but neither achieves much success. The Jingleheimer-Schwartz Cavalry charge the Pandours du Pinque and destroy them. The Batrachian cannons fire at the Muttonshire Musketeers to little effect. The Musketeers L’Ouef charge the Pfennig-Pfarthing Pfreikorps and are destroyed. The Cuirassiers Royale charge the Jingleheimer-Schwartz Cavalry and destroy them.


The Muttonshire Musketeers fire at the Cuirassiers Royale and destroy them.

At this point the only units left to the Batrachians are the cannons north of the river. So with no hope fo capturing and holding the bridges they beat a hasty retreat.

The Woostershire Muskets and the Soweiter cannon arrive, on the west road and southeast road respectively, but by this time the battle is over.


As before these rules played very quickly. Firing and combat are "bloody", in the sense that units can get destroyed quickly. That's not all bad and in fact is one of the reasons the games are quick. Not having to fiddle around with movement or search through pages of rules or follow complicated turn sequences help, too.
There were times where a combat could have gone either way or even where the odds favored one side, but I seemed to roll ones at just the wrong times for some of the cavalry. Positioning the Batrachian cannon on the north side of the river to fire across at the village worked well, even though according to the orders I rolled for the scenario maybe they should've headed for the bridges like the rest of the units. The Programmed Scenarios offer programmed options for both sides, as well as allow the player to play one or both sides. Often there are restrictions, special circumstances, etc, that will limit what you can do. There are also various things you roll for, from the maps to set up options to orders to reactions in some cases. This means each time you play a scenario it can vary quite a bit.

Tuesday, May 3, 2011

Ballyfoole Expedition to Afrodesia Marches Again

The Illustrated Ballyfoole Gazette
"Where we never let the facts get in the way of a good story"
Second Expedition Explores the Interior of Afrodesia
Using funds raised after their first, and very successful expedition, the Ballyfoole contingent once again set out to further explore the interior of Afrodesia. The jumping off point this time was from the edge of previously explored territory. The expedition was once again led by Captain Flynn, with O'Ryan the hunter and McGillicuddy the scout. They were joined by crack shot, Maggie O'Hara. Two soldiers from the Gunderland Highlanders, 4 askaris and 14 bearers were also present.

Day 1 they head west into the jungle and discover a new animal species. They also come across a village of friendly natives.

The column, seen here marching along near a stream.

Day 2 the terrain turns mountainous and they discover a new plant species. They encounter 8 hostile slavers. The first indication they had was a round of shots fired towards the rear of the column, killing 1 askari. The noise stirred up a huge crocodile in the nearby stream and a lion in a nearby patch of jungle. Both beasts charged towards the slavers, who were close by.
Things heat up quickly! Slavers and a lion and a crocodile!
The Highlanders fire back at the slavers, killing one of them. Meanwhile the explorers and askaris at the head of the column swing around to the rear to face their attackers.
While 1 slaver struggles against the crocodile and another fights the lion the rest of the slavers fire again. This time striking and killing one of the Highlander soldiers and narrowly missing Maggie. The expedition members, now in position, return fire. Flynn and Maggie each kill one slaver. The remaining slavers fire back, but don't hit anyone this time. Could be they're getting a bit shaken up between the beasts and the expedition's accurate fire. The expedition fires again, with the remaining Highlander soldier avenging the death of his comrade and 1 askari doing the same. The few remaining slavers decide they've had enough and make a run for it.
The expedition buries the dead soldier and askari.
The slavers are slowly whittled down

Day 3 is pleasant and uneventful, but McGillicuddy, the scout, is having difficulty finding a way through the mountainous terrain.

Day 4 while unsuccessfully searching for a way through the mountains the expedition encounters some treacherous quicksand. One askari, a trade bearer and an empty bearer are sucked under before they can be rescued.

Day 5 another quiet day while McGillicuddy still searches for a way through the seemingly impassable mountains.

Day 6 Drums in the Night. The morning reveals 3 trade bearers, 1 food bearer and 2 empty bearers have deserted. Finally McGillicuddy finds a way through the mountains, into more mountains.

Day 7 they discover a high mountain. They also encounter a village, but the natives eye them suspiciously and no trading takes place.

Day 8 monkeys get into the baggage destroying one food load. Stuck in the mountains again!

Day 9 while searching fruitlessly for a way through the mountains the expedition comes across an ancient ruined temple and gather up 5 loads of loot. All of their food has been eaten, lost or damaged, but O'Ryan the hunter manages to bag enough game to feed the party.

Day 10 they discover a new plant species
McGillicuddy finds a way through the mountains into more mountains. The party is attacked from the rear by a small band of 4 hostile tribal warriors armed with thrusting spears and clubs. 
Hostile native warriors attack a reduced column!

As the hostile warriors approach the rear of the column the Highlander turns and fires a shot, killing 1 of the warriors. Meanwhile the explorers and askaris move to face the attack.
The warriors charge towards the column, but the combined fire of the explorers, soldier and askaris wipes out the remaining warriors.
Hostile native warriors dispatched
No food today. One empty bearer succumbs.

Day 11 while searching unsuccessfully for a way out of the mountains the party encounters a sinkhole, nearly losing a bearer, the Highlander soldier and Maggie, who were all saved at the last moment.
Still out of food and no game to be found. McGillicuddy succumbs to starvation. Looks like luck wasn't with him on this trip. That's the way things go in Afrodesia sometimes.

Day 12 still looking for a way through the mountains. No luck. Bad water kills 1 askari and 2 loot bearers. O'Ryan manages to bag enough game to feed the remaining party members.

Day 13 Quiet day, nothing happens. Still stuck in the mountains, but O'Ryan bags more game so the party is well-fed.

Day 14 they discover a lake and a way through the mountains and a much reduced expedition returns to their jumping off point.

This expedition spent several more days out in the field than the previous one, but only covered about half the ground, with much time taken up trying to navigate their way through torturous mountain terrain. Sadly, it was the last trip for several expedition members. They will be mourned in city and native village.

Saturday, September 18, 2010

Jungle Terrain

I haven't been totally idle on the gaming front. I have a number of miniatures on the painting desk, which I will post pictures of as I finish them, and lots more in the queue. In the meantime, here is some terrain I have been working on in preparation for the Exploration of Afrodesia.
The various trees are made from wire twisted together for the trunks, branched out in the case of the one tree. With plastic or cloth foliage from aquarium plants or craft plants affixed to the trunks by wrapping wire or twine around the trunks. Then stuck to small pieces of mdf board, with a coating of gray "celluclay" around the trunks and on the bases. Celluclay is a sort of paper pulp that you mix with water. It's pretty lumpy, so not much good for fine sculpting, but great for tree trunks, rough ground, cliff edges, and for making rocks like the boulders in some of these pieces. More painting still to do on them, and probably some flocking.

Saturday, July 31, 2010

Ballyfoole Light Infantry and More

O'Ryan's Hunters (or Jaegers) of Ballyfoole, commanded by Captain O'Ryan - their origin as dragoons can still be seen in some of the accoutrements and uniform.
Maggie O'Toole, vivandiere for the Ballyfoole army
All of the above, as well as these two are Foundry miniatures.
The following 4 figures are from Askari Miniatures. I had ordered a sample pack and mentioned interests in Northwest Frontier Colonials, French Foreign Legion (ala Beau Geste) and possibly Pulp/adventure (albeit I'll probably go more Victorian era than 1930's). These are the figures they sent. The service was great! I ordered the figures on a Saturday night and received them the following Tuesday or Wednesday. Askari make several ranges that fit my description above, including some figures you don't usually see, like a set of "diggers" for an archeological dig. The fellow with the pickaxe is from that set (I did trim down his left arm a bit. The way it was sculpted it looked like he had a long sleeve on that arm and it was kind of an odd shape. So I shaved off the edge of the sleeve and filed doen the elbow a bit).
Prices are very reasonable, too. I expect I'll be ordering more from them in the future.

Sunday, June 27, 2010

The Battle of Offenbach Falls

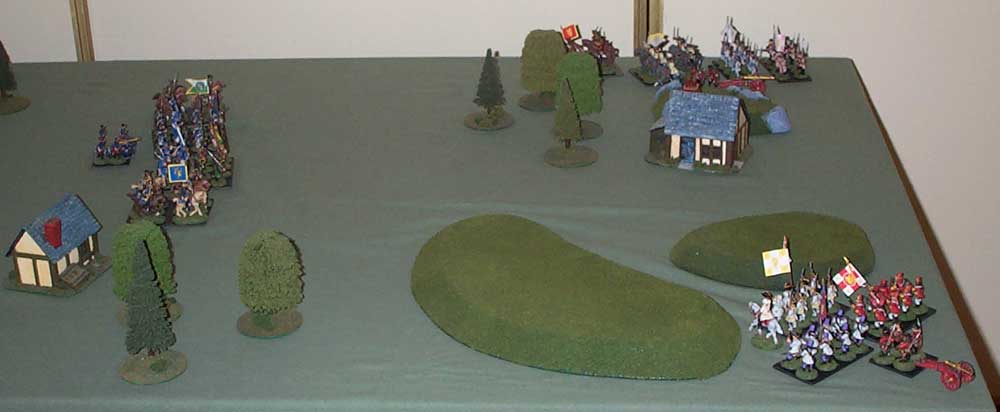
I rolled for initiative each turn, for the 2 sides, not for each force. As it turned out the Batrachians got the initiative for the first few turns. As the battle commenced and the Batrachian forces started closing in von Blunder decided to try and fight his way through the force he had originally been chasing. So rather than trying to change facing he continued on his original course.
Lumiere, commanding the force seen in the upper right of the picture, sent his cavalry ahead, with the infantry and artillery left to catch up as fast as it could.
Meanwhile, Soleau, commanding the force in the lower right of the picture spread out his infantry into a line and started moving them forward.
And de Siècle kept his forces together even though that would mean the cavalry would arrive later than if they forged ahead on their own.
The Soweiter artillery (the Offenbach cannon under Pachelbel) commenced fire at the Poupon Dragoons, who were accompanied by Lumiere, and caused a few casualties. The Mayeux Musketeers fired off a desultory first volley at the Dragoons, also causing minor casualties. The combined casualties were enough to cause the Dragoons to pull back.
The Poupon Dragoons rally. Meanwhile, the Cuirassiers Royale charge the Ballyfoole Dragoons. The resulting melee was indecisive with minor casualties on both sides.
The Fuselli Fusiliers and the Offenbach cannon fire at the returning Poupon Dragoons, destroying them as a fighting force in this battle. The Mayeux Musketeers fire at the approaching King's Musketeers, to little effect. The melee between the Cuirassiers Royale and the Ballyfoole Dragoons continues, with mounting casualties. Both sides pull back. The Jingleheimer-Schwartz Cavalry charge the Royal Batrachian Artillery, inflicting heavy casualties and causing the rest of the crew to flee.
Finally von Blunder manages to to seize the initiative. The Ballyfoole Dragoons charge the Cuirassiers Royale and inflict more casualties. The Mayeux Musketeers charge the King's Musketeers, giving better than they receive. The Jingleheimer-Schwartz sweep around to the rear of the Batrachian force. The Fuselli Fusiliers charge into the flank of the King's Musketeers, inflicting further heavy losses and putting Lumiere out of action (is he dead?). The Offenbach artillery limbers up to move off, with the Saxe-Urquhart Gunderland Highlanders close behind.
Of course, while this is all going on the other 2 Batrachian forces continue to close in.
The melee between the Cuirassiers Royale and the Ballyfoole Dragoons continues. The infantry melee between the Mayeux Musketeers and the Fuselli Fusiliers on one side and the King's Musketeers ends with the destruction of the King's Musketeers. The Hesse-Pfeffernusse Pfreikorps charge into the flank of the Cuirassiers Royale, inflicting more casualties. The few remaining Cuirassiers have had enough and flee. The Jingleheimer-Schwartz Cavalry charge the Queen's Musketeers in the rear, inflicting some casualties.
By now the Garde N'est Pas have approached close enough to fire a volley at the Highlanders, inflicting a few casualties. Then the Wild Goose Chasseurs charge the Highlanders, inflicting even more casualties. In spite of heavy losses the Highlanders hold.
The remaining Ballyfoole Dragoons charge the Queen's Musketeers from the front. The Mayeux Musketeers hit the Queen's Musketeers in the flank, and the Jingleheimer-Schwartz Cavalry continue to attack from the rear. In spite of being hit from 3 sides and suffering heavy losses the Queen's Musketeers hold on. The Hesse-Pfeffernusse Pfreikorps escape to the north, off the field of battle. The Offenbach Artillery and the Fuselli Fusiliers head in that direction as well. The Highlanders hold off the Wild Goose Chasseurs and the Garde N'est Pas who have charged them in the flank, with no casualties on either side.
The Highlanders fight on, but the combined weight of the Wild Goose Chasseurs and the Garde N'est Pas are too much and the Highlanders are destroyed. Did that buy enough time for the other units in the Soweiter force?
The Queen's Musketeers finish off the last of the Ballyfoole Dragoons, but are in turn wiped out by the combined efforts of the Jingleheimer-Schwartz Cavalry and the Mayeux Musketeers. The Offenbach Artillery and the Fuselli Fusiliers make it off the field of battle

The Musketeers L'Ouef fire off a parting shot at the retreating Jingleheimer-Schwartz Cavalry, inflicting minor casualties. The Mayeux Musketeers and the Jingleheimer-Schwartz Cavalry follow their fellows off the field of battle.

Final result:
Soweiter League losses (Batrachian losses don't figure into deciding victory in this scenario) are 9 infantry out of a total of 32, and 7 cavalry out of a total of 12, with no losses to the artillery crew. For a total loss of about 1/3 of von Blunder's forces. He needed to escape with 80% (or about 38 or 39 of his total of 48 figures) to achieve victory. But the Batrachians needed to destroy or capture 60% (or about 32 or 33 figures). So neither side achieved a clear victory.

Saturday, June 26, 2010

The Game is Afoot!

A clear summer's morning near Offenbach Falls and the game is afoot.
A Soweiter force lead by the capable (or is that culpable?) General von Blunder has chased a smaller Batrachian force into a corner.
The Soweiter units:
  • The Jingleheimer-Schwartz Cavalry
  • The Ballyfoole Dragoons
  • The Mayeux Musketeers
  • The Hesse-Pfeffernusse Pfreikorps
  • The Santa Sofia Fuselli Fusilieri
  • The Saxe-Urquhart Gunderland Highlanders
  • The Offenbach Artillery, Pachelbel's Cannon
The Batrachian units, commanded by the illustrious General Lumière:
  • The Cuirassiers Royale
  • The Poupon Dragoons
  • The King's Musketeers 2
  • The Queen's Musketeers 2
  • Royal Artillery 3


But wait! There's more! Another body of Batrachian troops appears to the southeast.
Commanded by the ambitious General Soleau:
  • The Musketeers L'Ouef
  • The Paprikash Pandours
  • The Pandours du Pinque
  • Royal Artillery 2

And that's not all! A third body of Batrachian troops appears to the southwest!
Commanded by the venerable General de Siècle:
  • The Wild Goose Chasseurs
  • The Garde N'est Pas
  • The Pandours St. Serif

Trapped like rabbits in a snare!
Or are they? Maybe von Blunder and the Soweiter forces can take a cue from the local fauna and ... runaway!

to be continued...

Saturday, January 16, 2010

New Construction

Recently I tried my hand at constructing some new buildings. The fronts and backs are made from mdf board (I think that's what it's called in the US anyway; not sure about the UK or other places. It's the soft stuff, smooth on both sides. Easy to cut and sand.) The sides are made from 3 inch wide pine boards. The building in the middle is the first one of these I made, which I completed as a sort of "proof of concept". The doors and windows are drawn on in pen and then painted. The base is separate so the buildings can stand on their own if I like.
The building on the left shows how I "clamp" them while the glue is drying, around a framework of legos, with hair bands to hold it all in place. That building also has an arch cut into it.
These 3 are all 3 inches deep by 4 inches wide and can hold 8 infantry figures.

The bridge on the right was one I made last year. The one on the left is a new one in progress - made with lessons learned from the first one.

Friday, January 8, 2010

The Battle of Kuhglockchen in Pictures

The table, expanded out to 40 by 56 inches.
The battle starts

The Soweiter forces re-organize their line

Battle continues

The Soweiter forces react quicker than expected

The Batrachians press forward

Both flanks of the Soweiter line under heavy attack

The Soweiter line falls apart

And the Batrachians emerge victorious.

For this battle I used 8 man infantry units, which allowed me to fit more units on the table. Some of these units were created by splitting some of my existing 16 man units. For the cavalry I used 6 man units, and 4 man for light infantry and artillery. The number of figures in all cases determined the number of dice I threw for firing and for melee. I counted a 6 as a hit, or a 5 or 6 with the first volley of infantry. Cavalry attacking infantry got hits on 5 or 6. If the unit taking the hits was in cover or cuirassiers (because of their breastplates) they could save on a roll of 6. I also used some similar simple "rules" for morale. I didn't measure movement or ranges, just moved or fired at distances that seemed about right. Very "fast and loose".

Friday, December 25, 2009

A Hippopotamus for Chrsitmas

I haven't been totally idle on the gaming front, but I don't have anything finished to show yet. I've been working on another bridge and a building, prepping minis for painting, doing some preliminary painting, etc.

Just to show off some of my Christmas goodies: A hippo from Foundry. I bought this and some other animals which will make appearances here as they get painted. I've always included some animals in my miniature collections. Way back when I was in my teens (and even before) buying the Airfix plastic sets, I remember having the Tarzan set with several animals.
And a new table to take the place of my old card tables for gaming. This is a very sturdy (and Heavy!) table that collapses down as you see it here. In this state the tabletop measures 20 by 40 inches. By pulling out one side and flipping over the top it can be expanded out to 40x40,. Pull it further apart and add 1 or 2 drop leaves and it can be expanded further to 40x56 or 40x72. The "drawers are just decorative, not functional. It would've been nice if the width was 48 indtead of 40, but even as is I think it makes a good gaming table. (Now I just need to "break it in".)

I hope everyone is enjoying the holidays!

Sunday, November 8, 2009

The Battle of Potzenpanz - illustrated

The Soweiter League's main force arrives, spread across the battlefront.

The Main force of the Batrachian army appears to the south, concentrating on the town of Poztenpanz and Potzie's farm.

Both forces advance on their objectives.


To the west the balance of the Soweiter League forces make their way through the village of Potzdorf.

Battle commences in the east.

The Jingleheimer-Schwartz Dragoons spot the Wild Goose Chasseurs.

The fighting continues in the east.

The Jingelheimer-Schwartz Dragoons and Wild Goose Chasseurs charge each other.

Things have not gone well for the Batrachians.

The Mayeux Musketeers and Ballyfoole Light Artillery reach the hill to the southwest of Potzenpanz.

Fighting continues.


The Mayeux Musketeers capture the Batrachian gun, while the rest of the Soweiter forces push the Batrachains out of Potzenpanz and Potzie's farm.

The Cuirassiers Royale finish off the Hasenpfeffer-Heisenberg Hussars, but by this time the battle is lost. Time to withdraw and leave the battlefield to the Soweiter League's forces.