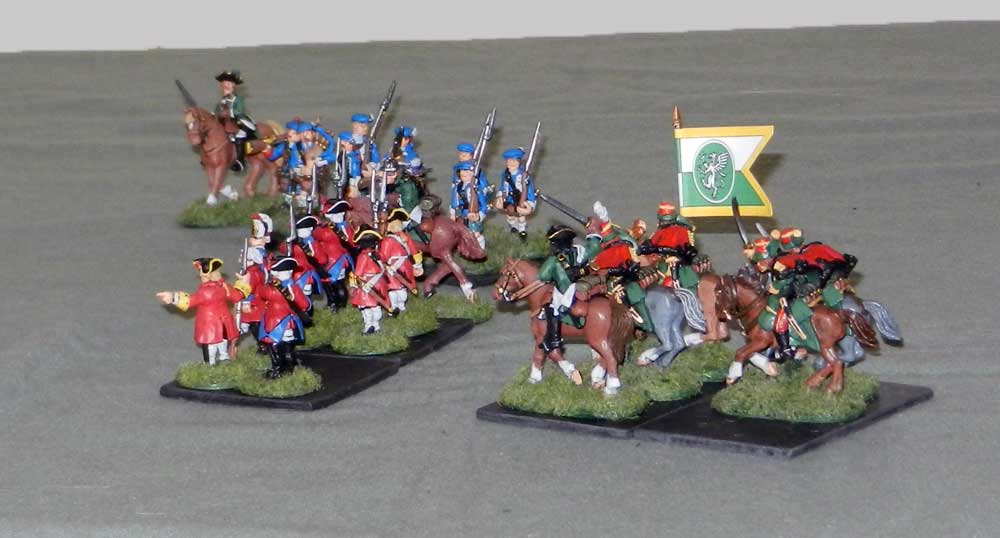
Sunday, September 2, 2012

NNW Patrol, part 2

Following the attack by mounted hillmen on the first day out the patrol continues onwards.

Day 2
Falling rocks! With a lot of luck on the die rolls only 1 Highlander was injured. During the next encounter he will be at minus 1 on shoot and scuffle.

Day 3 A messenger from the outpost meets up with the patrol. The messenger had been sent off to the fort to inform the Colonel that the outpost was under attack and bring back reinforcements if possible. The messenger is a trooper from the Ballyfoole Dragoons (same shoot and scuffle as the Hussars, who he joins up with). After previously coming that way he leads the patrol around 2 bands of hillmen on foot, saving the patrol some time.

Day 4
Nice and quiet. Nothing eventful happens as the patrol progresses towards the outpost.

Day 5
More of the same. It's quiet (too quiet? shh! Don't say that!)

Day 6
Scouts find a shortcut, saving the patrol more time. They reach the outpost ahead of schedule or expectations.

Aside from the first encounter I was very lucky with the card draw and die-rolling. It could just as easily have gone a different way with more attacks, accidents and delays.

Next up, the showdown at the outpost. At this point I realize I don't have suitable structures to represent the outpost so I will have to make do with buildings more suitable for Europe. C'est la guerre.

NNW Patrol, part 1

The patrol, as described in the previous 2 posts, sets out from the fort. Just 1 day out they are attacked by 2 bands of Hillmen on horseback. Each band consists of 5 extras and 1 leader.
The leader of band 1 is Ali Baba, leader: scuffle 14, shoot 13, save 11
Obviously a well-seasoned fighter, excellent at close combat and shooting.
The leader of band 2 is Aka Akbar, leader: scuffle 12, shoot 13, save 10
Only a little less intimidating than Ali Baba.

Using a mix of regular GASLIGHT and Battles by GASLIGHT rules from the Compendium the battle played out as follows.
Apologies for the fuzzy pictures! I didn't realize I had the flash of until later. Call it "fog of war".

Turn 1
Scouts spotted the approaching tribesmen and the column was able to deploy quickly. I rolled 1 die, 50/50 chance to spot the approach. If they had failed the patrol would've had to remain in column until their first turn.

The Woostershires got off the first volley as band 1, led by Ali Baba, arrived within long range of their muskets. The first and only hit was against Ali Baba, but he made his save. Then Lt. Berite and Sgt. Basset fire. Sgt, Basset hits Ali Baba again, but this time the hillman leader fails his save and is struck dead.
In return the band of hillmen pass their morale roll and return fire, but score no hits.
The Highlanders also fire at band 1, but score no hits. These rounds of firing are all at long range, which halves the chance of hits.

Meanwhile, band 2 fires at the Ballyfoole Hussars, killing 2, including Lt. O'Toole, who fails his save.

Turn 2

The Hussars pull back behind the infantry to regroup.
Band 2 moves in towards the Woostershire Musketeers. The Woostershire Musketeers fire at band 2, scoring 2 hits at close range now.Lt. Bertie and Sgt. Basset also fire at band 2, with the Sgt. scoring a hit.
The Highlanders fire at band 1, scoring no hits. Lt. MacCaber and Sgt. MacGowan each score 1 hit on band 1. Band 1 fails its morale roll and runs away, its movement taking the remaining hillmen of that band off the table.


Turn 3
The Highlanders swing around to flank band 2 of the hillmen. As does Captain Flynn.
The Woostershires fire at band 2, killing 1 hillman. Captain Cholmonderleigh fires and hits Aka Akbar, but the hillman leader makes his save.
Band 2 fails their morale throw and fire and random. Aka Akbar fires at the Woostershires and kills i extra.

Turn 4
The Highlanders fire at band 2, scoring 3 hits. Aka Akbar fails his save and the last hllman is killed, ending the fight.

Final tally: 3 mounted hillmen survive to join the next encounter. 2 Ballyfoole Hussars and 1 Woostershire Musketeer are dead.

By luck of the die the sergeants made more hits than most of the officers.

A quick little action which altogether took well under 2 hours, even with time for taking notes and pictures and leafing through the rulebook and all. With greater familiarity of the rules (and maybe a quick reference sheet for the firing/combat tables and morale) something like could be played out in less than an hour I reckon.

One last picture that came out a bit sharper. A parting shot if you will.

Stats for the NNW Patrol forces

I followed the suggestions in the GASLIGHT Compendium for the "extras", and rolled on the tables for the characters. In addition there are several scenarios laid out in the book with various forces outlined for further ideas of suggested values and makeup of forces.

The Patrol:
Captain Flynn, hero: scuffle 13 | shoot 15 | save 15 | move 12 inches (on horseback)
Captain Cholmonderleigh, adventurer: scuffle 10 | shoot 10 | save 15 | move 12 inches (on horseback)
Ballyfoole Hussars, extras: scuffle 9 | shoot 9 | save na | move 12 inches (on horseback)
Lt. O'Toole, leader: scuffle 10 | shoot 10 | save 10 | move 12 inches (on horseback)
Sgt. McLachlan, veteran: scuffle 10 | shoot 10 | save 7 | move 12 inches  (on horseback)
Gunderland Highlanders, extras: scuffle 9 | shoot 9 | save na | move 6 inches (on foot)
Lt. MacCaber, leader: scuffle 10 | shoot 9 | save 12 | move 6 inches (on foot)
Sgt. MacGowan, veteran: scuffle 10 | shoot 10 | save 7 | move 6 inches (on foot)
Woostershire Musketeers, extras: scuffle 9 | shoot 9 | save na | move 6 inches (on foot)
Lt. Bertie, leader: scuffle 8 | shoot 11 | save 10 | move 6 inches (on foot)
Sgt. Basset, veteran: scuffle 12 | shoot 10 | save 9 | move 6 inches (on foot)

Hillmen:
generic extras: scuffle 10 | shoot 7 | save na | move 6 on foot or 12 on horseback
characters rolled as needed

(not sure if this format is the best or easiest to follow. I wish blogger would add support for doing tables.)

Saturday, September 1, 2012

Setting up for a Patrol on the NNW Frontier

I played the first part of a scenario/game today, inspired by Danjou's Hand at
his tabletopdiversions blog. I have garnered quite a bit of inspiration from that blog, from ideas for random dungeons, solo play, and the ideas that I adapted for this scenario.

The scenario is this, a small outpost several days from a main fort on the North-by-Northwest Frontier of Afrodesia has not been heard from for a bit too long. The area has seen some recent agitation on the part of the local hill tribes. So the colonel in command of the fort sends out a patrol consisting of 1 unit of Gunderland Highlanders, 1 unit of Woostershire Musketeers, a unit of Ballyfoole Hussars, with Captain Flynn in command and Captain Cholmonderleigh (pronounced "Chumley") as second in command. They're mission is to head to the outpost, find out what's happening and help out if needed.

I wrote up a few possible encounters and events on small index cards:
1. 2 units of Hillmen (Pathans or similar) on foot, 8 figures and 1 leader each. Roll 1D6, 1-4, shoot from cover if possible; 5-6, shoot once and then move in to close combat
2. 1 unit of mounted Hillmen and 2 units of foot, 8 figures and 1 leader each. Full attack/battle as best as they are able.
3. Cobra! Random figure startles a cobra and is killed. If it's a main character roll for save.
4. 1 unit of 5 mounted Hillmen and 1 unit of 8 foot Hillmen, each with a leader. Roll 1D6, on a 6 the Hillmen withdraw; add 1 to the die roll each turn.
5. Snipers! Shots ring out from the hills. Roll 1D6 for number of hits. Randomly determine who is hit. Characters roll to save.
6. 5 mounted Hillmen with 1 leader. Roll 1D6, 1-4, hit and run - they try to get close enough to shoot, from cover if available, and ride away if they take any hits; 5-6, they shoot once and then try to charge in and engage in close combat.
7. Messenger from the outpost meets up with the patrol. The messenger had been sent to notify the fort that the outpost was under attack by local hill tribes. He leads the patrol onwards, and since he has already had to evade armed bands he guides the patrol around the next potential encounter and saves them some time. Remove the next card from the deck. Any forces listed get added to the next encounter on a die roll of 1-3 on 1D6.
8. Falling Rocks! (whether a natural event or Hillmen trying to cause some damage, who knows?) Roll 1D6 for each figure, on a roll of 6 the figure is injured and is at -1 for all abilities (scuffle and shoot) during the next day's encounters/events. Characters roll to save as usual.
9. 2 units of 5 mounted Hillmen, each with one leader. Roll 1D6, 1-2, hit and run attack as in number 6 above; 5-6, they shoot once as soon as they are in range and then try to close into close combat.
10. Rope Bridge. Only figures on foot may cross. Others have to find another route. If the patrol decides to split up only use the foot figures in encounters or events until the others can rejoin. Roll 1D6 each day, 1-3 they rejoin the patrol; 4-6, try again the next day. If the patrol doesn't use the rope bridge they have to go around and lose time; add another card to the deck.
11. Scouts have discovered a shortcut. If there are any cavalry figures present remove the next card from the deck. Any enemy forces are bypassed this time and get added to the next encounter on a roll of 1-4 on 1D6.

I also added added 2 blank cards, representing uneventful days. I shuffled the cards and dealt out 4, face down. Then I dealt out 4 more cards and added in another card labeled "The outpost is reached" and put these 4 under the first 4 cards. So I now had a deck with 9 cards, with the "outpost" card somewhere in the bottom half. When that was reached it would be time for the battle at the outpost. The longer it takes to get there the more outpost soldiers will be found dead or wounded. Also, enemies surviving from encounters along the way would be added to the final battle at the outpost.

The events and encounters are meant to provide some possible quick small skirmishes, to make the arrival time uncertain, to possibly affect the condition of the patrol when it reaches the outpost without seriously debilitating it, to allow for some uncertainty in what enemy forces will be encountered once the outpost is reached, and to add some "color" and interest to the "story" of the game.

I am using the GASLIGHT rules for these encounters and battles, as I did for the battle described in the previous post.

Next up will be a report on the patrol "so far".

Sunday, August 5, 2012

Gaslight on the NNW Frontier

I had purchased a copy of the GASLIGHT Compendium when it came out and there it sat. Recently, while looking for some light wargaming reading in odd spare moments I pulled the book out and skimmed through it. And this weekend I decided to try a solo game with them. I used the "Battles" version for activation, unit firing and unit combat and morale, and the standard rules for main characters. I kept the forces small, both in numbers of units/characters and number of figures per unit, but I think I can increase that and still have a good game on a small table. I played this little encounter on my 40 inch square table.

Just a simple encounter between two units of European regulars, the Ballyfoole Musketeers and the Gunderland Highlanders. Both rated 8 for Shoot (used when firing) and Scuffle (used for combat). I decided their muskets had a range 18 inches (for long range and 12 for short) and required reloading. The arms used by the natives were rated the same. The overall commander of the force was Captain Wilfrid Hyde-Psmith on Grand Thidwick (Leader; scuffle 13, shoot 9, save 11). The Gunderland Highlanders had Sgt. MacDour (Veteran, scuffle 8, shoot 5, save 9) and 6 regular troops (Extras in Gaslight terminology, scuffle and shoot 8, no save). The Ballyfoole Musketeers had Sgt O'Flynn (Veteran, scuffle 7, shoot 11, save 8) and Cpl. McGillicuddy (Veteran, scuffle 8, shoot 10, save 11) and 5 regular troops (Extras, scuffle and shoot 8). All of the values for the main characters were rolled on tables in the rules.

The natives were lead by Mohammed Khan (Leader, scuffle 10, shoot 10, save 9), who took personal command of one group of 5 natives (Extras, scuffle 10, shoot 7). Jhames Khan (Veteran, scuffle 7, shoot 12, save 7) and Kubla Kai (Veteran, scuffle 10, shoot 6, save 9) each commanded another 5 natives.

On the first turn everyone moved closer to the enemy. The Pathans coming down out of the hills and the Europeans moving forward in open ground. (The dice are used for determining who gets to act when using the Battles version of the rules. It's a combination of dice and cards.)


Turn 2, the Europeans continue to move forward. Suddenly shots ring out from the band of Pathans on the right. These are the ones commanded by Mohammed Khan, the overall leader. They are at long range and the Ballyfoole Musketeers hold their ground. No one is hit. The other 2 bands of natives move forward. (Not having anything else handy I used some little round wood disks from some game to mark which units would need to reload before they could fire again.)

Turn 3, return fire on the same band of Pathans who had fired at them, striking 2 dead with their volley, while Cpl. McGillicuddy hits another one. The Gunderland Highlanders fire a volley at the middle band of Pathans and kill the leader of that group, Kubla Kai. Sgt. MacDour shoots one of the troop.
The band of Pathans on the right, bolstered by the presence of Mohammed Khan pass their morale test from casualties received and reload. The band of Pathans coming up from the left fire at the Gunderland Highlanders, killing one man. The leader of that band, Jhames Khan fires at and kills Sgt. MacDour (fired at the unit, random roll determined it was the Sgt. who was hit. The Sgt. didn't make his save roll.) And the middle band of Pathans recovered from the death of their leader, fired at the Highlanders, but no one was hit. (apologies for the poor picture quality in these next couple of shots especially.)

Turn 4, the band of Pathans on the right, lead by Mohammed Khan move forward so as to be within charge range. Everyone else reloads.

Turn 5, the Highlanders fire at the center band of Pathans, killing 2. A flurry of shots from the Ballyfoole Musketeers, Cpl. and Sgt., kills another Pathan. The center band of Pathans return fire on the Highlanders, killing one man. The left hand band of Pathans move forward. And the right hand band passes their morale check for casualties, but then fails to charge.

Turn 6, the right hand band of Pathans fails to charge again. The Highlanders, Ballyfoole Musketeers, and center band of Pathans all reload. The left hand band of Pathans fires at the Highlanders, killing 2 more.

Turn 7, the Highlanders fire at the laft hand band of Pathans, killing another man. The Ballyfoole Musketeers fire at the right hand band of Pathans, killing the last "extra" and hitting Mohammed Khan, who passes his save. Cpl. McGillicuddy also fire at Mohammed Khan, scoring a hit, but Mohammed  Khan again makes his save. But all of these close hits/misses give Mohammed Khan pause. (he fails his morale roll and freezes, no actions this turn - this was an error, an unattached main character doesn't have to roll for morale)
The center band of Pathans fires at the Highlanders, but score no hits. The left hand band of Pathans charges the  Highlanders, killing two, while the Highlanders kill one of the Pathans. Captain Hyde-Psmith fires his pistol at the Pathans as they charge in, killing one more.

Turn 8, with the Highlanders destroyed Captain Hyde-Psmith joins the Ballyfoole Musketeers. The Ballyfoole Musketeers reload. The left hand and right hand bands of Pathans fire at the Ballyfoole Musketeers, but score no hits. The two extras in the left hand band of Pathans fail their morale and the result is to run off the table.


At this point I figured there were too few Pathans left to do much, but I played one additional turn to see what might've happened. In the event the Ballyfoole Musketeers and Cpl. McGillicuddy fire off a volley and kill Mohammed Khan. The Captain and Sgt. O'Flynn fire at the center band of Pathans, but don't score any hits.

A fun little game. I think it took around 3 hours over 2 days, but that includes setup, taking notes and pictures, thumbing through the rule book, etc. The game took up little space, especially once everyone closed in. I could easily add more figures without overcrowding the tabletop or overtaxing my mind with numerous units and characters to keep track of. With more figures and/or units playing time would likely increase, but with practice that should drop down again, too. I like the simpler methods for units/groups of figures/extras from the Battle rules and the fact that I can use the standard rules (or even the role-play rules) for main characters. There were some things I couldn't find in the rules, such as stats for standard weapons, rules for determining if a main character receives casualties, especially when part of a unit that has been hit, rules or guidelines for anyone pulling back from combat, and probably other stuff. In those cases I made a judgement call or rolled the dice. With the combination of dice and cards used for activation I could through in a wildcard or two to add random events. (the way it works is you roll a die for each unit and each independent character, place the die next to them to mark them, then pull from a small deck of cards numbered one to six. I used regular playing cards for this, so it would be easy enough to add in a joker for random events. When the card matches the die that unit can act. In the case where more than one unit/character has the same number on the die you roll to see who goes first when the card comes up.)

This has potential for further games.

Friday, July 6, 2012

Idle Thoughts 4


Combat
By stands and individual figures. Each stand and some individuals have a combat value, this is the number of dice they roll in combat. Some modifiers will add or take away dice . Other modifiers might add or subtract from the total. And some things may allow re-rolls or drop the highest or lowest dice rolled. (maybe not all of those will be part of the proceedings)

Multiple units can combine their roll if they are all in full contact with the enemy. This way 2 or more weaker units could “gang up” on a single stronger unit. Or several individuals could group together.

In hand-to-hand combat each side rolls the number of dice allotted and then the totals are compared. The loser is removed from play. If there is a tie the combat continues in the combat phase of the next player’s turn. If a “unit” which includes a stand and one or more attached individual figures or multiple individual figures acting together loses the combat roll even odds to see who gets removed from play. For example, if there is a stand with 1 leader figure roll 50/50; if there are 3 figures roll 1-2/3-4/5-6. Alternatively, remove standard-bearers and musicians first, then randomly determine which, officers/leaders/heroes/stands get removed?

A musician or standard-bearer might add 1 dice to the total combat dice (but may not be able to fight on their own?). A unit that is uphill or mounted might add another dice. A leader attached to a unit might allow a re-roll of 1 die (player’s choice, presumably the lowest die).

Some examples:
A stand of goblins might get 2 dice, while a stand of dwarves might get 4 dice. A large beast like a great dragon or dinosaur might get 5 or 6 dice (or more).


Firing
Procedures apply to both small arms and artillery, unless noted otherwise.
As with combat each stand and some individual figures have a ranged combat value (maybe different from their hand-to-hand combat value?). And, as with hand-to-hand combat, this is the number of dice they start with. Both the firer and the target roll (do I need a third attribute for a unit's defense/"resistance" versus firepower? hmmm, getting away from simple?), but only the firer can inflict casualties (alternatively, they can return fire if able?). Modifiers would include removing dice and/or adding/subtracting from the total for longer range, target in cover or armored, etc. Multiple units do not combine their rolls; each fires separately. Totals are compared and if the firer’s total is higher the target is removed from play.

Some of my thinking behind this: Again I think the procedures/mechanisms are fairly simple, and basically the same for hand-to-hand combat, small arms fire and artillery fire, so no need to learn different basics for each. (as usual, keeping in mind these are untried half-formed (and half-baked?) thoughts). I also think it would make for quick resolutions and fast games. I don’t think morale rules would be needed, as units and figures would be removed from play and eventually one side or the other (or both?) would either fulfill victory conditions or become unable to through lack of troops. This doesn't mean units are fighting to the death, but just to the point that they are no longer effective.

Thursday, July 5, 2012

Idle Thoughts 3


Movement
Use sticks or some other measuring device like a ruler or tape measure, with short, medium and long moves. Lengths are 3, 5 and 8 inches. Movement is in a straight line. The one exception is movement on roads follows the road. Facing can be changed before and after each move segment. Firing can be done before or after any move segment.

Movement rates clear terrain                        rough terrain
Line infantry      1 medium (5 inches)           1 short (3 inches)
Light infantry     2 short (3 and 3 inches)      2 short (3 and 3 inches)
Regular cavalry 1 long (8 inches)                 1 short (3 inches)
Light cavalry     2 medium (5 and 5 inches)  2 short (3 and 3 inches)
Foot artillery     1 medium (5 inches)            Only on roads

Terrain
Units must stop when they reach a terrain feature. That ends that move segment even if the unit didn’t move the full segment. If the unit has another move segment it can then move through the terrain feature. All movement that starts in terrain features uses short segments, even if part of the move ends up being outside the feature. Foot artillery can only move through terrain features on roads.


There could be variations due to terrain type, unit type, presence of some sort of guide with a unit, etc..

Some of my thinking behind this: It's fairly simple, but still flexible. I think it simplifies terrain effects and avoids requiring calculating remaining movement rates or fractional moves as you move through different terrain, allows light troops to be more flexible and quick in rough terrain or getting around obstacles. Units like regular cavalry can be fast at the expense of maneuverability.